Friday, April 27, 2012

Pin Curls are the business!

When I was a little girl my mommy would set her hair using paper bag strips to roll up her strands and had the most beautiful head of curls when she removed them!  I didn't think of this as a possibility for my strands until I became tired of  many sleepless nights trying to wear big, plastic rollers to bed!  Now, I've never tried setting my hair on strips of paper bags, but I did try her other suggestion and that was setting my strands in pin curls.  Viola!  This method of setting my hair was a keeper!

Hair worn lose from pin curls.

Pin curls allowed me to sleep comfortably at night and if I didn't feel like removing them quite yet the next morning, I could throw on a large beanie cap or a fashion head scarf and go out to run errands without anyone knowing about the madness going on underneath. 

Pin Curls
I only took a few images when I straightened my hair a few weeks ago (remember, I had to leave to run an errand that couldn't be avoided) because I was short on time trying to complete the process upon returning home. I don't have images showing the process,  however, I did take a few images to show how I use my straightening comb and curling iron before setting my pin curls.


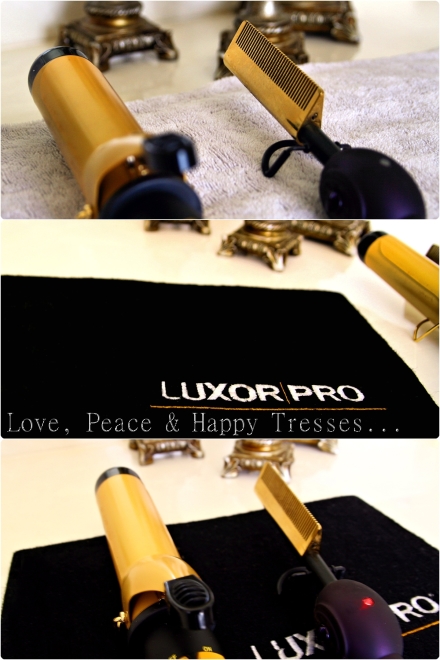
In the images above my hair has already been straightened, but I wanted to show how I use my straightening comb and curling iron when pressing my strands.  Also, in the images above neither the pressing comb, nor the curling iron is on.  I don't re-press or re-curl the hair after first pass.  I may touch up my edges if I feel the need, but do so with my flat iron only.

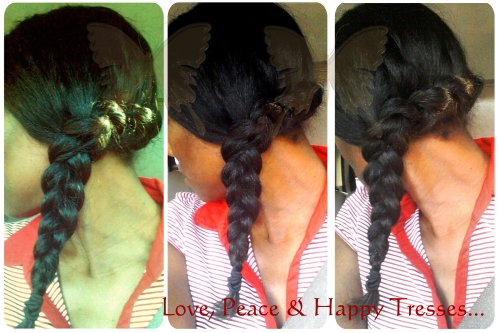
Prior to pressing, my strands are set in large two strands twists (about 8 or 10).  I'll remove one twist and comb through with a wide tooth comb then follow with a smaller comb to aid with smoothing out the strands.  On the left, after irons are heated (couple of minutes), I'll take a small section of hair and slowly (using caution) press my roots straight along my edges.  I continue passing the pressing comb through to the end of my strands (top middle).  Notice in the image above the white item used along the back of my sectioned hair as I pressed it straight.  This is soft sock.  I use it to aid in applying pressure to the comb while straightening my strands.  I use to used an old towel, but prefer the soft texture of the sock instead.  Once the strand is straightened, I proceed to use my curling iron by passing it along the entire section of hair, then begin to curl upward.

Hair is oiled lightly before creating pin curl.
After completing the straightening and curling process for my entire head, I begin the process of pin curling sections.   I use the same pattern found within my post, Roller-set, I still have Options!
I begin by taking the ends of sectioned hair and make a big circle loop.  I keep circling the loop until I reach my scalp.  Once at the scalp, I pin/hold the curl in place with a click-clack.   Because of my hair's current length, I like to make big loops.

You may find that with longer hair, your pin curls may overlap one another and this is okay.   You may also like/want to use fewer sections of hair and this is fine as well.  I like lots of body and this
routine/pattern works well for me.
Pin curls are protected and wrapped at night in a satin scarf.

When removing my pin curls, I work slowly to avoid snares.


Removing pincurls.
Hair styled using pincurls
After all clips have been removed, I follow-up by gently combing with a wide tooth comb.  Curls cascade into place with a little help with direction.  If you haven't tried pincurls, what are you waiting for?  Go for it, you won't regret it!
Loving my curls in any form!

One lovely blog award...

Love, Peace & Happy Tresses has been given the "One Lovely Blog Award" from Jeni from
Just Grow Already!. This award was truly an unexpected, wonderful surprise. Thank you Jeni!

In accepting this award I will share 7 things about myself:
1)  I love seafood!  My favorite is crawfish with BBQ crab legs a close second.
2)  Love listening to country music. My mom grew up on farm and I guess I'm a country girl at heart.
3)  I watch Green Lantern, Young Justice, ThunderCats and Legends of Kora on Saturday mornings. Hey, I'm the only girl in a house full of men.
4)  I wear eyeglasses.
5)  Considering returning to school to study law.
6)  Hubby calls me "baby girl" even though I'm older than he is.
7)  I love eating Kimchi!

Here are a few more lovely blogs!

Monday, April 23, 2012

Straight talk...

MIA!  I know, I know...better late than never!

I've been asked several questions since posting images of my natural tresses straightened.  The most FAQ is what tools did you use to straighten? I blogged about my favorites and my not so favorites in this posts.

Luxor Pro Beauty Mat, Jilbere' Curling Iron, Hot & Silky Pressing Comb
Okay (top image)...in the past, I use to use two folded bath towels to place my hot irons on while I straightened my hair in order to protect my bathroom countertop.  This has proven in the past to be disastrous in that my towels over time would have burn marks from repeated use over time, which would turn into holes, then eventually into towels thrown into the trash.  My countertop would be protected, but my bath towels paid the price.  Didn't want to continue on in this way, but I didn't have another option until I ran across the Luxor Pro Beauty Mat Protective Ultra Heat Protective Surface.  I love it!  I have had and used this little jewel for over two years going strong!  Both my bath towels and my countertops are safe.

Wednesday, April 11, 2012

Another twist on braids!

Me and my family went to see a movie this past weekend and I noticed this hairstyle on the lead actress.  I made an attempt to re-create this look for me and I'm quite pleased with the outcome.  It's has been very warm and humid these past couple of weeks and I don't like to wear my hair out in those conditions so I would normally put my hair into a ponytail, but now I have a new style that I love!

I put my cornrow skills to the test!  I started on the nape of one side and braided along the nape to the other, gathering sections of hair as I went along.  

When I got to the other side, I gently brushed the hair towards the back to meet up with the braid then proceeded to add hair to create one braid down the side of my shoulder.

Love this braid!

Monday, April 9, 2012

Blast from the past! My first set of flat twists!

My first set of Flat Twists

Looking through my photo archives I found these images taken of my first set of flat twists worn out as a style.  I have to revisit this style this summer, with a slight variation, but I WILL re-visit this style!  I think this may have been done on blow-dried hair or from a old twist-out.  Not sure, but when I do re-visit this style, I'll post a tutorial.

Hope your weekend was a blast and happy Monday!

Sunday, April 8, 2012

He Is Risen!


Song

"God sent His son, they called Him Jesus
He came to love, heal, and forgive.
He lived and died to buy my pardon,
An empty grave is there to prove my Savior lives.

Because He lives, I can face tomorrow.
Because He lives, All fear is gone.
Because I know He holds the future,
And life is worth the living just because He lives."
Giving Glory to God, my Savior Lives!
Have a wonderful and blessed Easter!

Friday, April 6, 2012

Weekend Project - Image Wall!

How to cover a huge wall of empty space?  Here's an idea...use the space as an on-the-wall photo album of your favorite portraits.  It covers the wall and makes for great conversation when friends and family come over to visit!


I purchased several individual 5x7 frames with 4x6 mats.  I also purchased a poster frame to hold my collage of images.  In the past I actually purchased a collage frame for my images, but ended up liking the look above better. 


I purchased my frames at a local Walmart store, but choose any frames you like and they don't have to be the same size and shape.  Let your creative juices flow!


To make the collage in the poster frame above I glued my 4x6 portraits (printed at home) to the picture insert that came with the frame.  Honestly, I think it would have been better if I had used a thin mat, used to frame portraits, instead.  It's much steadier than the thin paper insert that comes with the poster frame.    Use the insert as a guide to measure the size of your mat if so choose to use one instead. 

As you can see above, I tried to keep everything uniformed on the left.  Continuing onward, I began to overlap my images to make them fit inside the frame.  I wish that I had used this method of overlapping from the beginning, but a bit more exaggerated by mixing horizontal and vertical images throughout.   All in all not bad!

Thursday, April 5, 2012

Photo of the day!

Wednesday, April 4, 2012

The long and short of it!

This week I'm wearing my natural tresses straightened. The weather has not been too cooperative, thus I've been wearing a twisted updo for the past few days and wore it out on Sunday for church and then yesterday to take a few images. 

The long and short of it is, my "long" hair is paired with my favorite (my only) pair of jumper "shorts". 
Romper: TJ Maxx
I love little details!

I began straightening my hair, but had to stop to run an impromptu errand.  I didn't take any other photos once I got back.  I wanted to finish it as soon as possible before evening.


Hair worn out after removing twist updo.

Today we have fog, thus back in an updo til the weekend!  Have a very happy and dry Wednesday!


Blogging tips